How to deal with snow

vftt.org

Help Support vftt.org:

This site may earn a commission from merchant affiliate links, including eBay, Amazon, and others.

forestgnome

New member
Joined
Dec 3, 2004
Messages
2,625
Reaction score
600
Location
..Madison, NH
kneeling-bull-moose.jpg


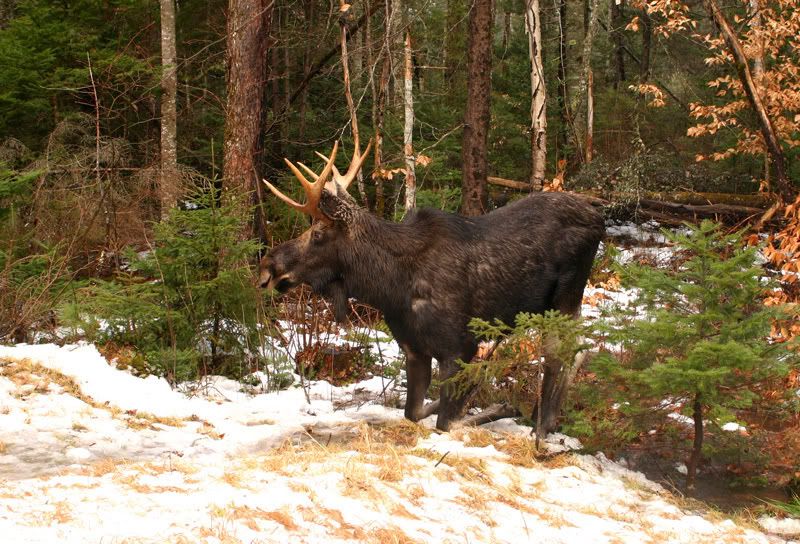
A basic "rule" for snowy scene is to overexpose by 1.5 stops. However, what about when there's only a little snow in the scene?

OK, I've already contradicted myself about the centered subject :rolleyes: Sometimes it just works better. I tried putting him more to the right but I like it like this. And since he's kneeling, there's no feeling of motion. He's in a stationary position and he's not really looking at anything, just watching his surroundings.

So, what are your tricks for dealing with snow?


Note: looks like the image size should be smaller to fit the screen.
 
Last edited:
High dynamic range pics are always a problem.

* Take your exposure on what ever you are focused on
or
* Expose for the highlight and postprocess to bring up the dimmer section
or
* Shoot raw (higher dynamic range) and adjust each section of the pic individually.
or
* Bracket exposures and pick later
- it is also possible to combine sections from each of the exposures to cover the range.

Digital post-processing can fix/improve a number of ills.

Doug
 
With such a contrasty scene, there is not much you can do. Shooting in raw and fix it later only goes so far, and photoshop can't work miracles. That being said, double processing the image and masking can help alot, but takes alot of time.

Exposing for the highlights works well too, but then the moose gets muddy, and the forest goes dark.

I think you got this scene exposed just about as perfectly as you could, and the bright snow is hardly a distraction. And what a scene to nail the exposure on!!! Perhaps just some burning down low...

How do you always find yourself so close to these things. I gotta leave the dog at home more often...
 
That's a nice shot. One thing you can get is a graduated neutral density filter. They are a little difficult to use and so are mainly used on still landscape photographs. You can get them as standard screw on filters, but then exactly half of your photo will be in the darkened area. You can also get them as glass sheets you can slide to only darken what you want.

I use them on my landscape photographs sometimes. I can darken the sky and clouds to the level of the ground so they are both properly exposed.
 
Most digital camaras have about 4-5 stops of dynamic range. (Similar to slides--negatives generally have a bit more.) A scene can have as much as 10 stops of range.

http://www.luminous-landscape.com/tutorials/digital-blending.shtml describes a method for taking multiple images at different exposures and digitally combining them after the fact. Looks like a bit of work, but if you are really serious...

Doug
 
Mongoose said:
One thing you can get is a graduated neutral density filter.

Mongoose brings up a good point...whereas traditionally they are used to hold back the sky, I've turned them upside down and at angles to hold back different aspects of landscapes before.

For example, in this shot, the water would have blown out, and the trees never would have glown...so a two stop GND down low did this:
IMG_7028e1sm-vi.jpg


I think a one stop filter coming in at an angle would have saved the highlights, however, I'm not sure given that it's a wildlife image how fast you would have to set it up. Just a thought...
 
Top